Rovy Part 2: Video stream from onboard camera using AWS KVS

Overview
This is the second part of the project that tackles on sending a peer-to-peer video stream from the rover’s onboard camera into our frontend mobile application using WebRTC and AWS Kinesis Video Stream (KVS) as the Signaling Server.
Recap
In Part 1, we have covered how to build a rover and control the motors over the internet using MQTT. We also got into the frontend (UI/UX) side of things, wherein we used React with the Ionic framework to create a mobile application with the joystick library to control the steering. If you haven’t read the first part yet, I suggest going through it to get an overview.
Source Code
If you want to dive right away into the code for this article, you can check it out here:
- Rover Hardware (branch ->
rovy-part-2) - Mobile App (branch ->
rovy-part-2)
I will be pushing updates to the repositories as I add more things (i.e sensors) into the rover as I progress in the future, so the main branch might look different by the time you are reading this. As for this article, please refer to the specified branch.
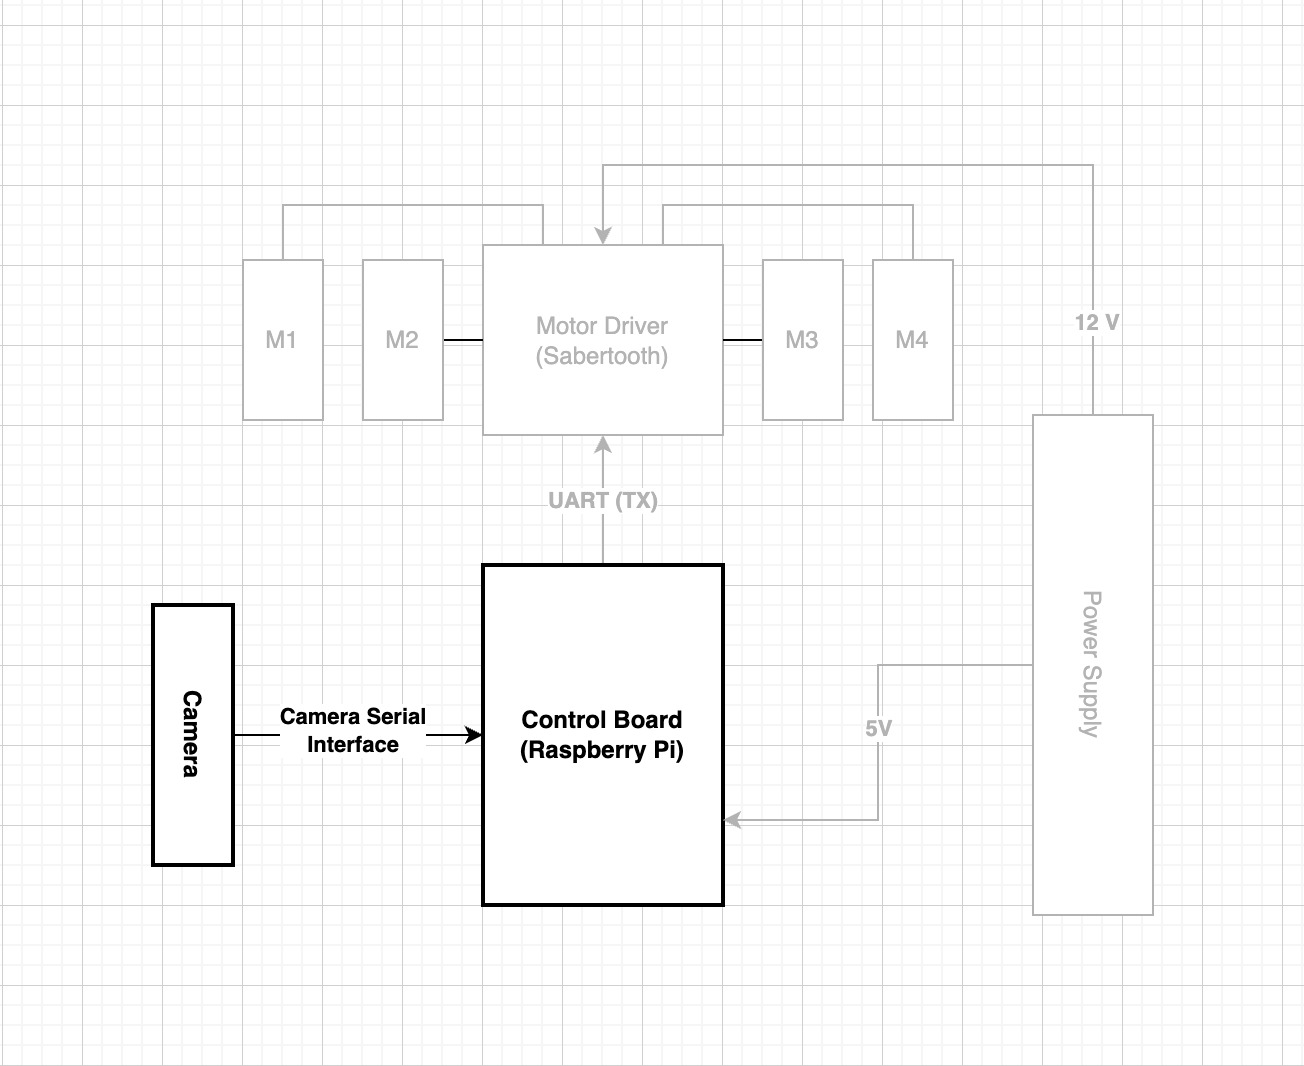
Architecture
The diagram below illustrates the high-level view of the system’s workflow on streaming video from the rover’s camera to the mobile application via WebRTC. This article leans a lot into WebRTC, you can go through the fundamentals to get an overview of the peer-to-peer concept.

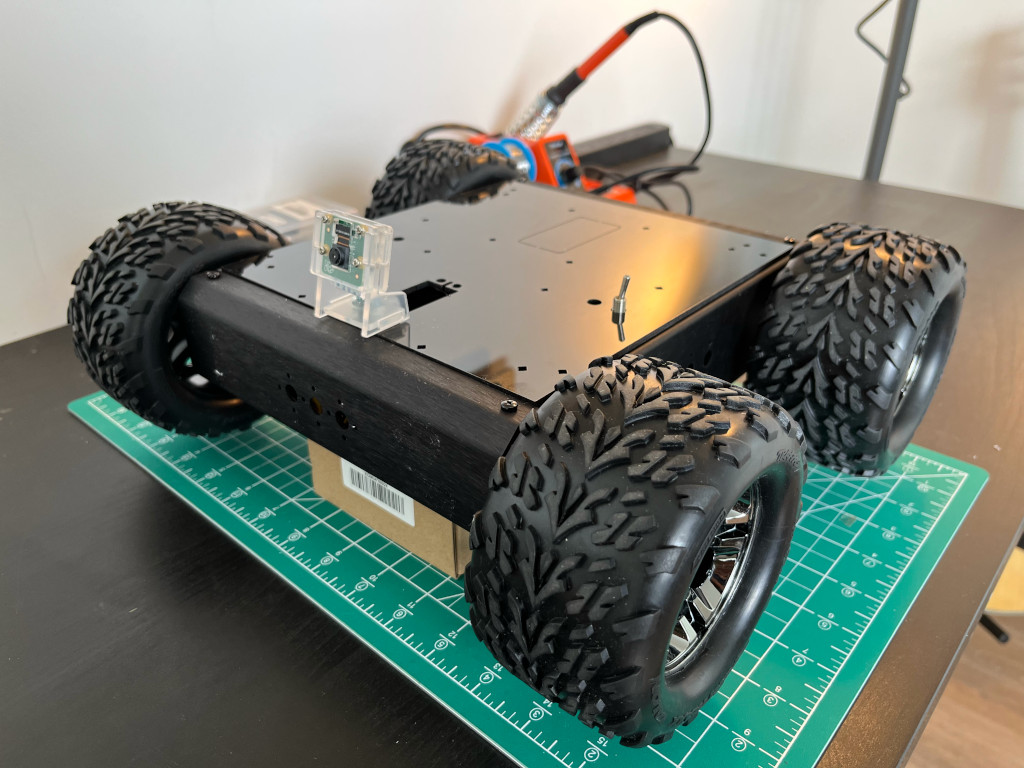
Hardware
In this part of the project, we’ll be focusing on two components which are the Raspberry Pi and Camera.
Schematic
We simply connect our Camera directly into the Raspberry Pi through the Camera Serial Interface (CSI)
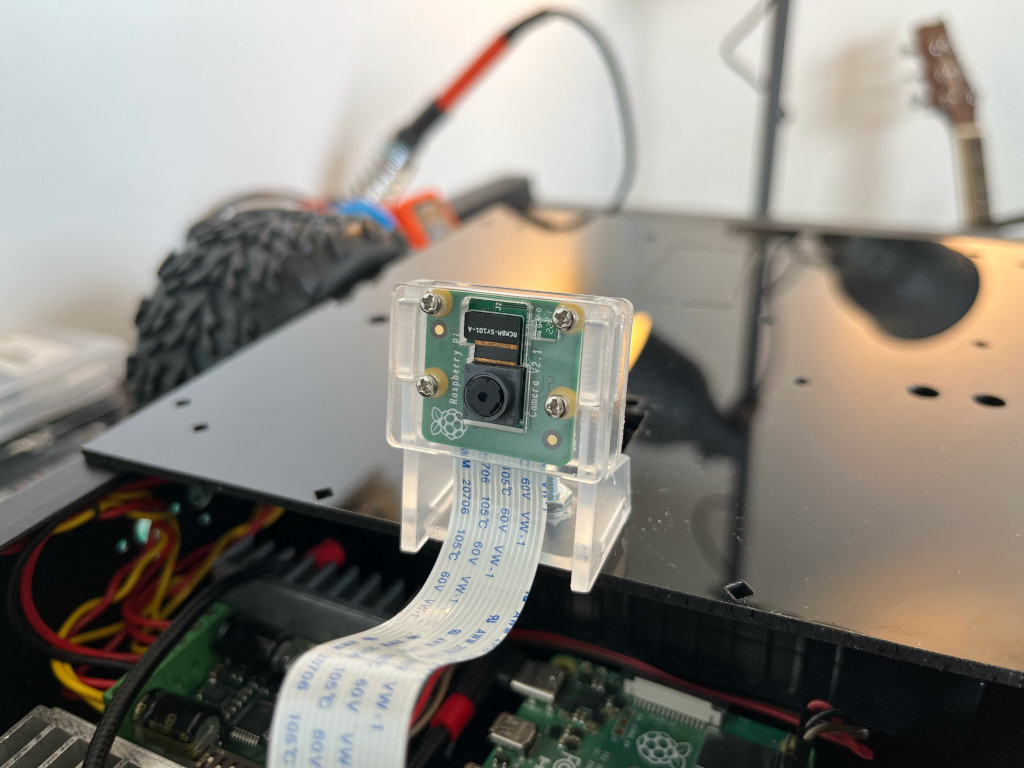
Camera
The camera that we will be using is the Raspberry Pi Camera Module 2. The v2 Camera Module has a Sony IMX219 8-megapixel sensor (compared to the 5-megapixel OmniVision OV5647 sensor of the original camera).
You can read all the gory details about IMX219 and the Exmor R back-illuminated sensor architecture on Sony’s website, but suffice to say this is more than just a resolution upgrade: it’s a leap forward in image quality, colour fidelity, and low-light performance. It supports 1080p30, 720p60, and VGA90 video modes, as well as still capture.
Raspberry Pi connection
The connection between the camera and Raspberry Pi is simple, it attaches via a 15cm ribbon cable to the CSI port on the Raspberry Pi.
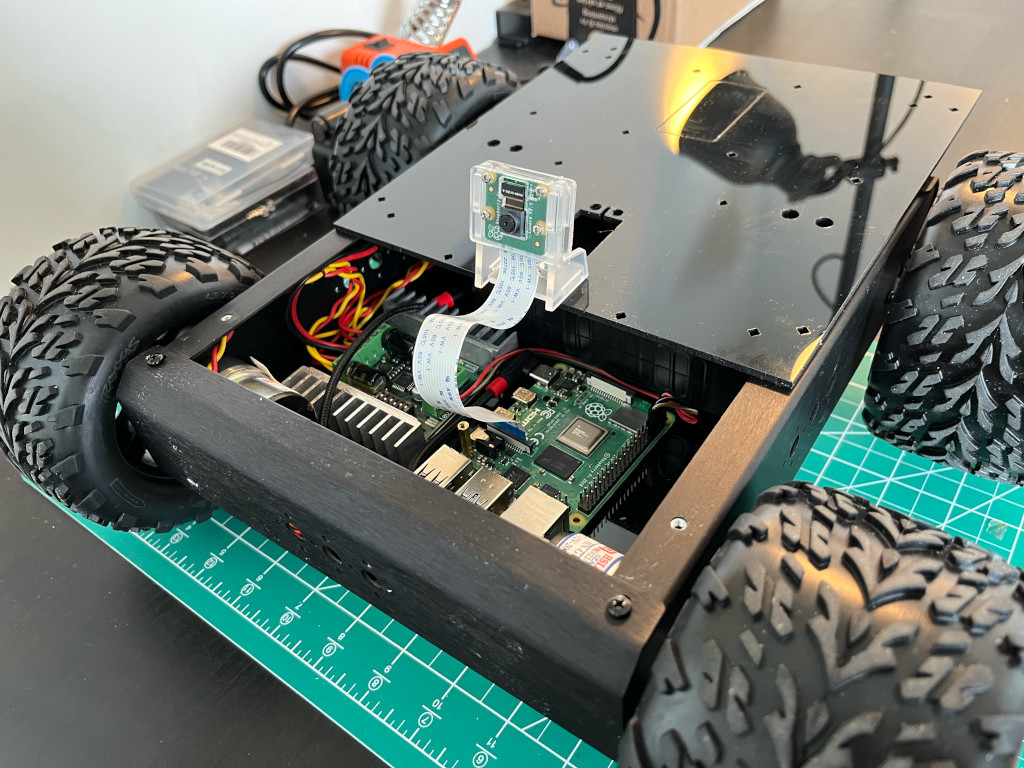
The camera works with all models of Raspberry Pi 1 to 5. It can be accessed through the MMAL and V4L APIs, and there are numerous third-party libraries built for it.
Setup
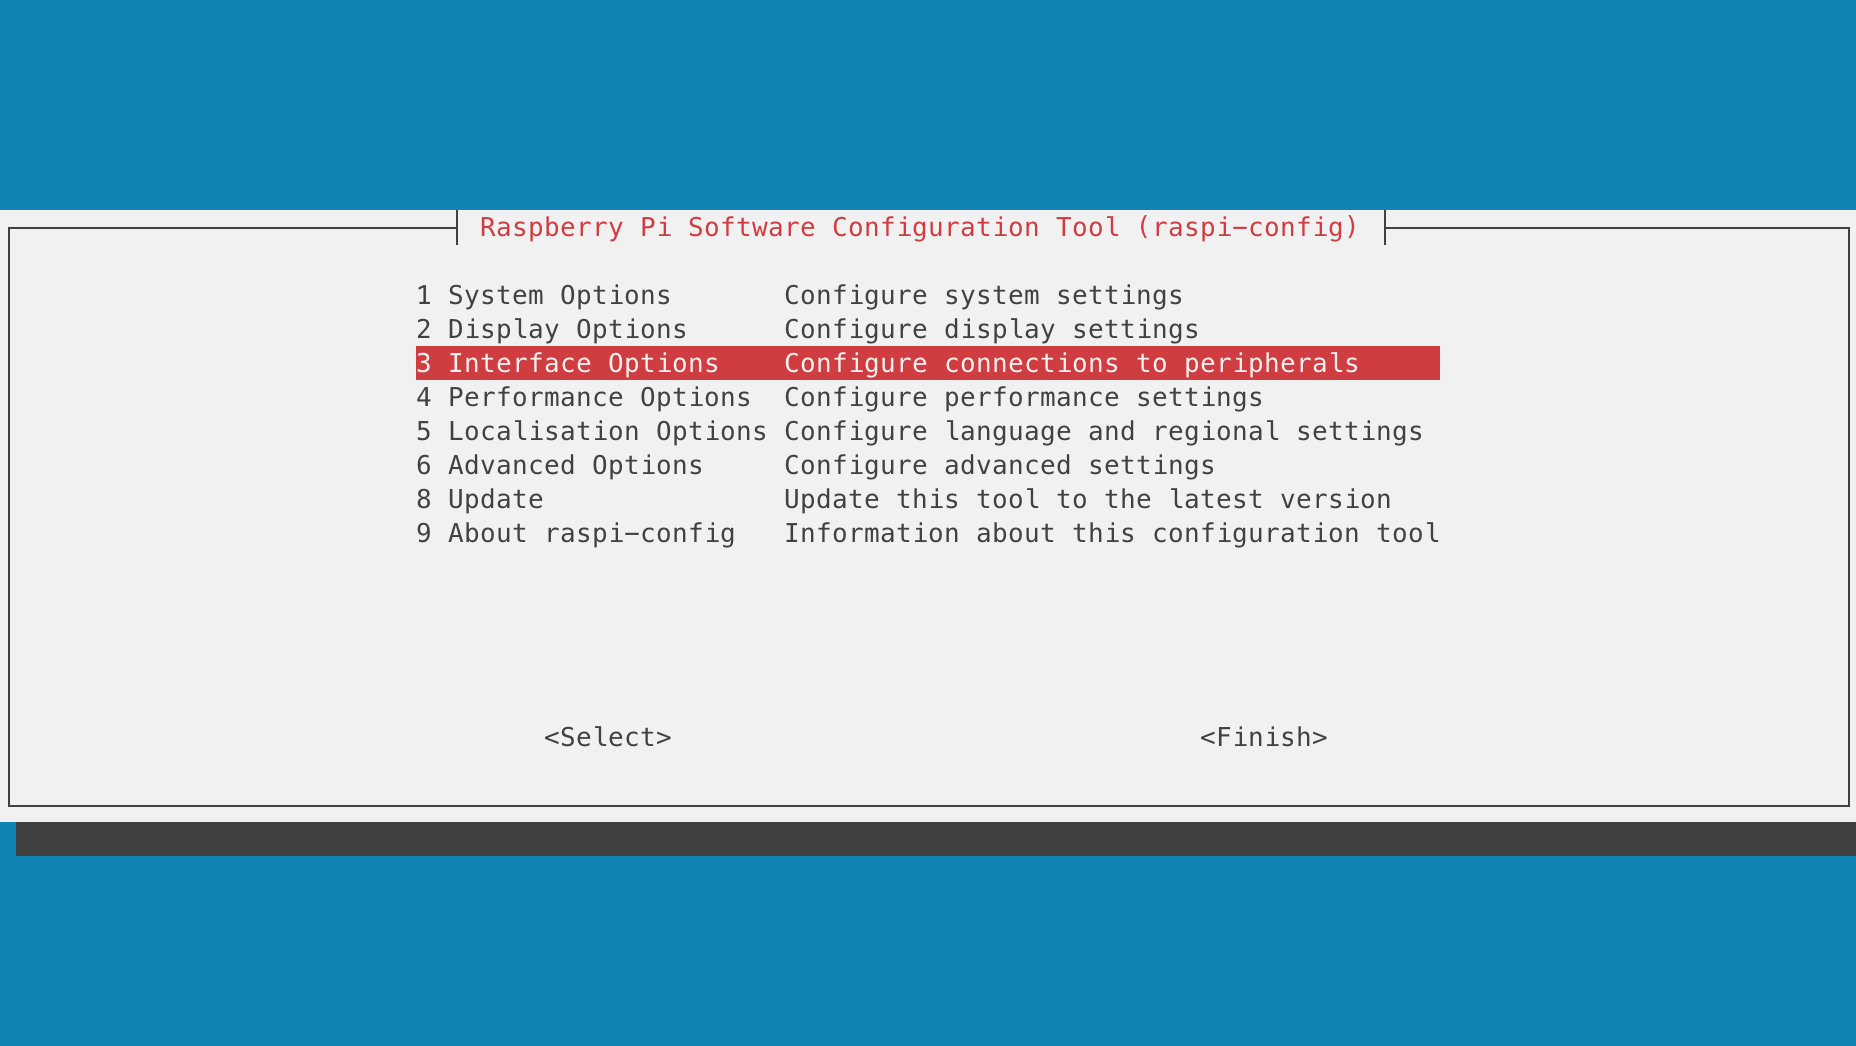
The operating system we have on this project is a Raspbian (Buster). The very first thing we need to do is enable the Camera Interface. In our terminal, we enter:
$ sudo raspi-configOnce you are inside the raspi-config user interface. Go to [3] Interface Options.
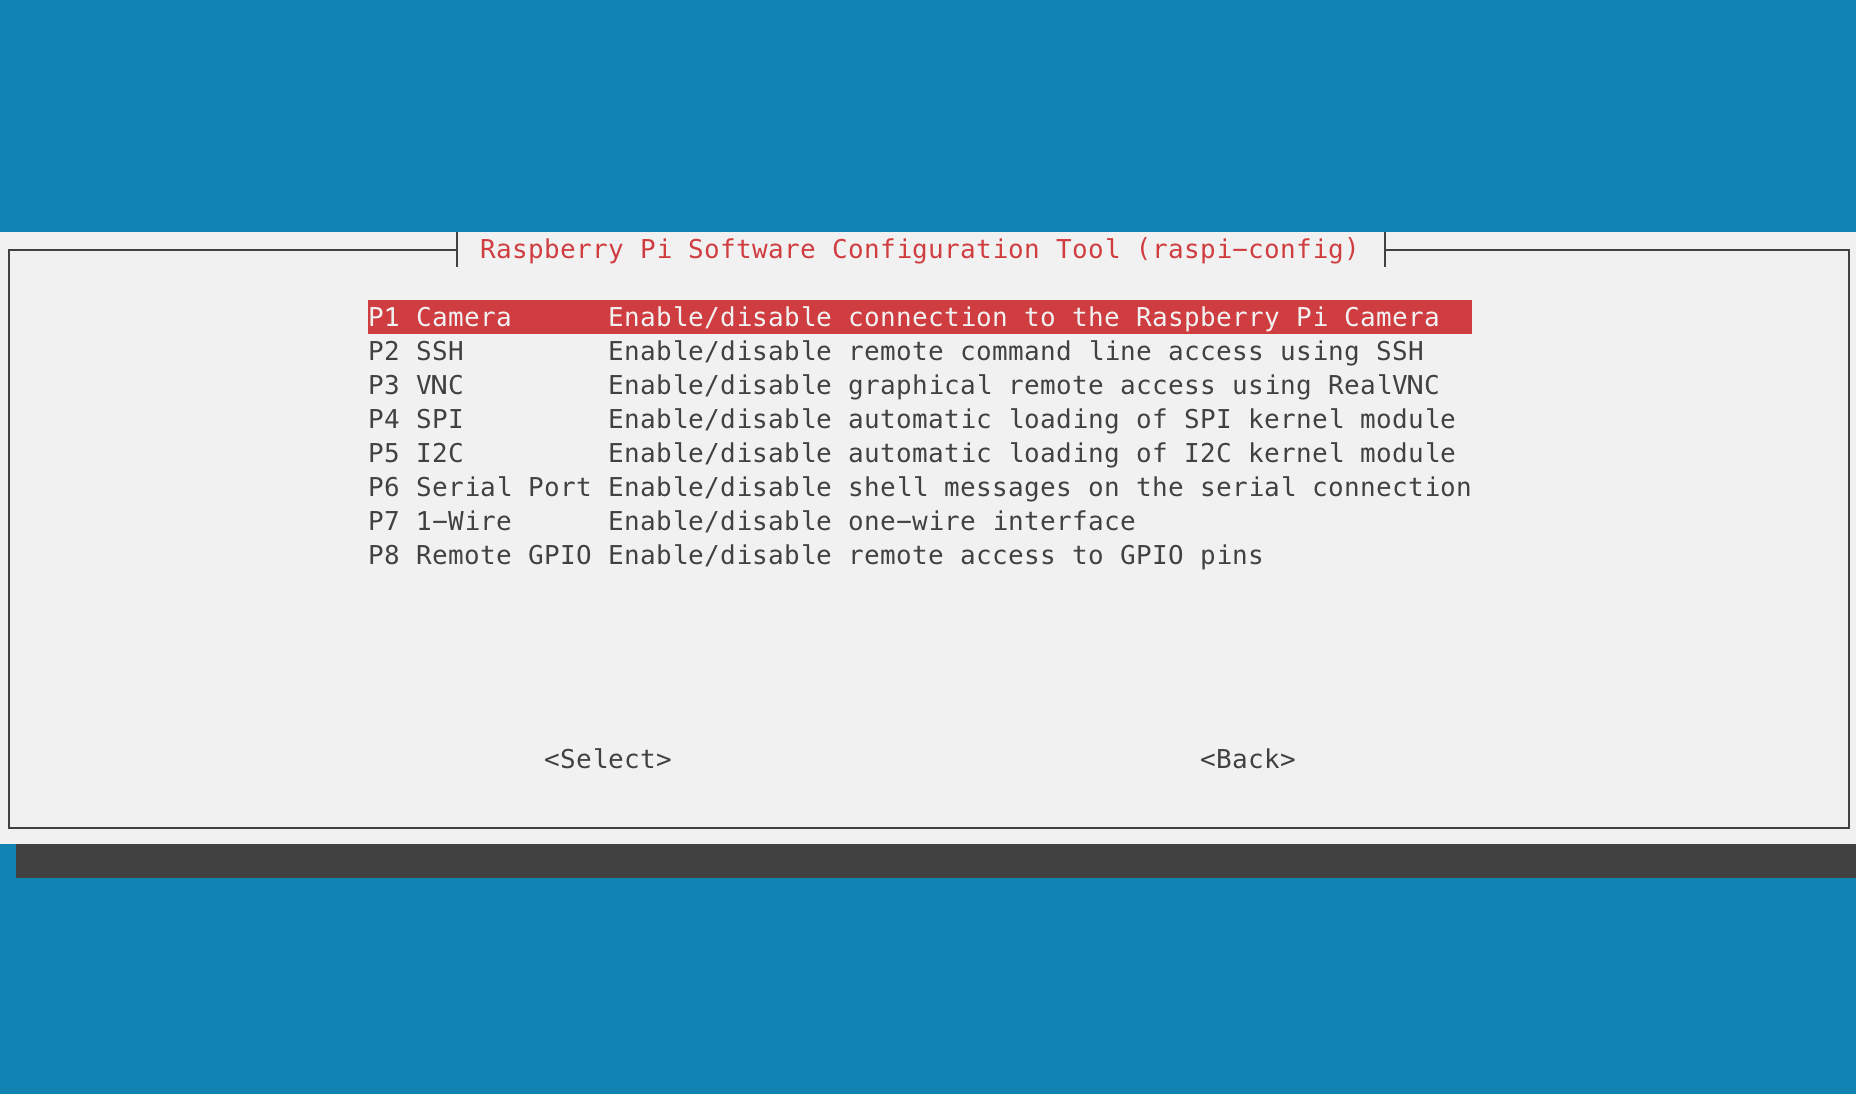
Select the [P1] Camera and press the Enter key to enable the camera serial interface
Install linux libraries
For us to be able to stream the video data from the camera into the aws-kvs-sdk we need to install the necessary gstreamer libraries
On the terminal, we have to do an apt-get:
$ sudo apt-get install libssl-dev libcurl4-openssl-dev liblog4cplus-dev libgstreamer1.0-dev libgstreamer-plugins-base1.0-dev gstreamer1.0-plugins-base-apps gstreamer1.0-plugins-bad gstreamer1.0-plugins-good gstreamer1.0-plugins-ugly gstreamer1.0-toolsBy default
pkg-configandCMakeare installed in Raspbian, if not then you also need to install these and a build environment.
Download KVS SDK
The next step is to download the sdk from the awslabs github repository.
git clone --recursive https://github.com/awslabs/amazon-kinesis-video-streams-webrtc-sdk-c.gitBuilding the AWS KVS SDK
We need to create a build directory in the newly checked out repository, and execute CMake from it.
$ mkdir -p amazon-kinesis-video-streams-webrtc-sdk-c/build; cd amazon-kinesis-video-streams-webrtc-sdk-c/build; cmake ..To build the library and the provided samples run make in the build directory you executed CMake.
$ makeThe build will take a while to complete, so get yourself a coffee while waiting 😉
Setting the AWS environment variables
On our Raspberry Pi terminal, we need to run:
$ export AWS_ACCESS_KEY_ID= <AWS account access key>
$ export AWS_SECRET_ACCESS_KEY= <AWS account secret key>
$ export AWS_DEFAULT_REGION= <AWS region>
For the IAM User, we are going to set the permission on the action field as a wildcard * for now. We can add a more strict security later on.
{
  "Version": "2012-10-17",
  "Statement": [
    {
      "Effect": "Allow",
      "Action": "kinesisvideo:*",
      "Resource": "arn:aws:kinesisvideo:<region>:<acct_id>:stream/test-stream/<acct_id>"
    }
  ]
}
Create a stream on KVS
The next step we need to do is to create a stream on AWS side. On the AWS Console, we need to go to Kinesis Video Stream, then Video streams, then click on Create video stream button.
And we’ll be prompted with this page:
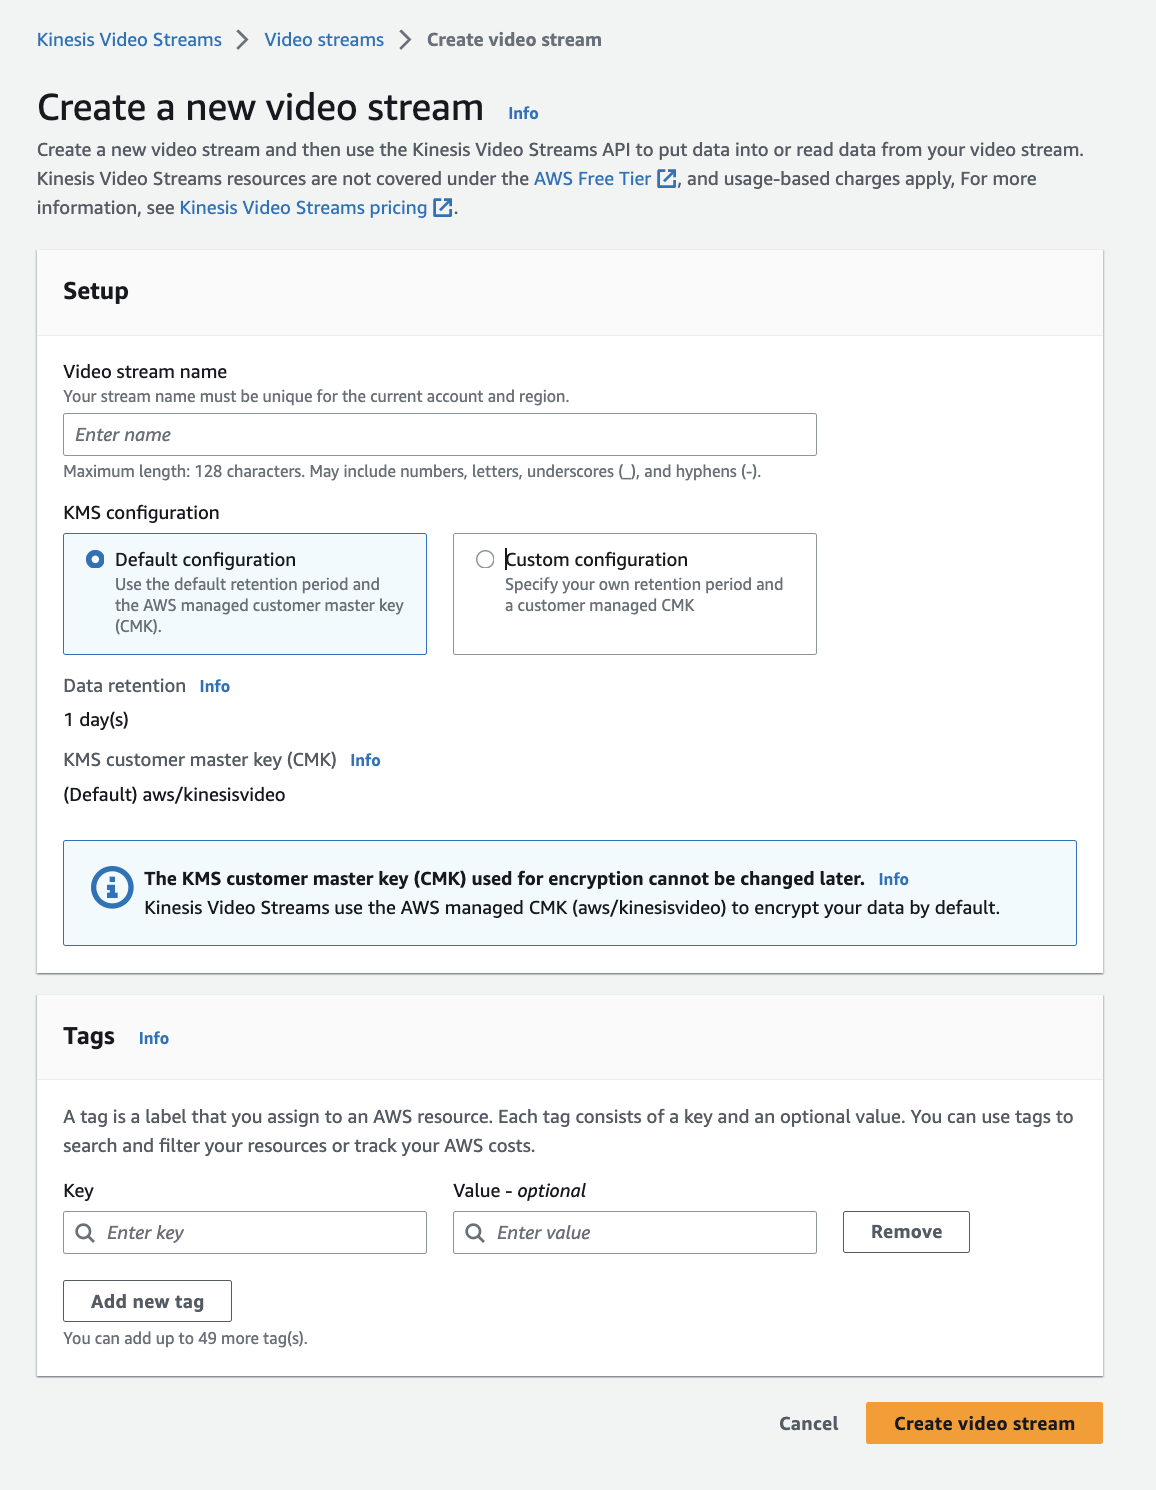
We can input any name we want for the video stream (it must be unique). We’ll just select the Default configuration on the KMS configuration for now. We can also add tags as an option.
Testing the video stream
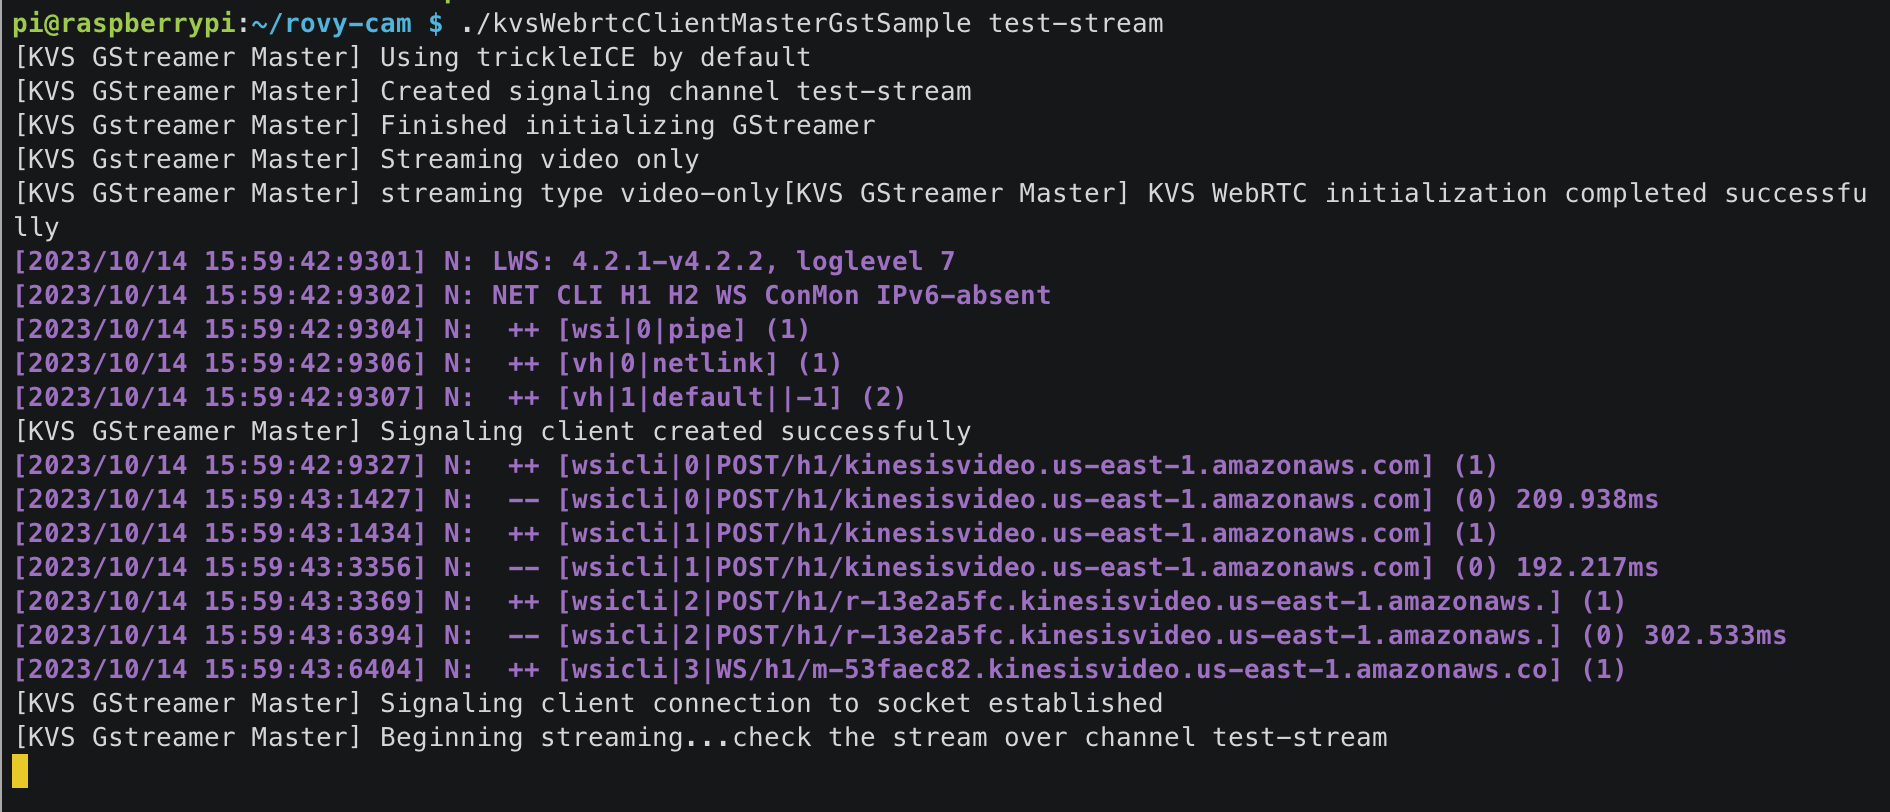
In the build folder, go to samples, then run kvsWebrtcClientMasterGstSample
$ ./kvsWebrtcClientMasterGstSample <channelName>In our case, we have test-stream as the channel name of the KVS stream.
$ ./kvsWebrtcClientMasterGstSample test-streamThe output in the terminal would look this:
In this part, we can already do a quick test if the video transmission actually works. We can go to the KVS WebRTC Test Page, which is a sample browser client that AWS has developed. You can also spin this up locally by pulling the repository from here.

You will initially be prompted with the AWS region, credentials, and other options, but it should be quick and easy to get started.
Integrating with Nodejs
Now that we are assured that our camera and sdk are working properly with the video transmission to AWS KVS, the next thing we need to do is to make it run along with our motor controller Nodejs code.
I copied kvsWebrtcClientMasterGstSample executable file that we built earlier into a directory ~/rovy-cam (It can be any directory you want).
In the code, I added a child process that will execute the kvs client.
const { spawn } = require('child_process');

const kvsClient = spawn('/home/pi/rovy-cam/kvsWebrtcClientMasterGstSample', ['test-stream']);

kvsClient.stdout.on('data', (data) => {
  console.log(`stdout: ${data}`);
});

kvsClient.stderr.on('data', (data) => {
  console.error(`stderr: ${data}`);
});
This will also give us an event listener that will enable us to monitor the logs of the incoming KVS responses. Managing the stream startup during boot would also now be easier, as we are managing everything in one place.
Frontend
We will now proceed with the “Viewer” end of the video stream, which we will append to the mobile app that we have developed from Part 1. The concept that we are implementing here will be similar to the KVS WebRTC Test Page that we used earlier to test the video stream.
Environment setup
In our frontend mobile app’s code base, we need to install these libraries.
$ npm install @aws-sdk/client-kinesis-video @aws-sdk/client-kinesis-video-signaling amazon-kinesis-video-streams-webrtcIn Part 1, there is a more detailed discussion on how the frontend has been setup with Ionic and React.
AWS KVS Client connection
We’ll create a react component called KinesisWebRTC, and import the libraries that we just installed.
import {
  KinesisVideoClient,
  DescribeSignalingChannelCommand,
  GetSignalingChannelEndpointCommand
} from '@aws-sdk/client-kinesis-video';

import {
  KinesisVideoSignalingClient,
  GetIceServerConfigCommand
} from '@aws-sdk/client-kinesis-video-signaling';

import { SignalingClient } from 'amazon-kinesis-video-streams-webrtc';
I have created a constant object that would serve like an enum that we’ll be using later.
const OPTIONS = {
  TRAVERSAL: {
    STUN_TURN: 'stunTurn',
    TURN_ONLY: 'turnOnly',
    DISABLED: 'disabled'
  },
  ROLE: {
    MASTER: 'MASTER',
    VIEWER: 'VIEWER'
  }
};
I have also intially defined here the configuration needed to connect into AWS KVS.
const state: any = store({
  accessKey: process.env.AWS_ROVY_KEY,
  secretAccessKey: process.env.AWS_ROVY_SECRET,
  sessionToken: '',
  region: process.env.AWS_ROVY_REGION,
  role: OPTIONS.ROLE.VIEWER,
  channelName: 'test-stream',
  clientId: getRandomClientId(),
  endpoint: null,
  natTraversal: OPTIONS.TRAVERSAL.STUN_TURN,
  useTrickleICE: true,
  playerIsStarted: false,
  signalingClient: null,
  remoteView: null,
  peerConnectionStatsInterval: null,
  peerConnectionByClientId: {}
});
I am using react-easy-state for now to manage the states. I might refactor this in the future to just only use the native
useState.
This will be our component for the video player. Which is a <video> embed element.
const VideoPlayers = view(() => {
  return (
    <>
      <div id="video-players">
        <video
          style={{
            width: '100vw',
            height: '100vh',
            objectFit: 'cover',
            position: 'fixed',
            top: 0,
            left: 0
          }}
          ref={state.remoteView}
          autoPlay
          playsInline
          muted
        />
      </div>
    </>
  );
});
The entry point for the KinesisWebRTC is the code block below:
const KinesisWebRTC = view(({ setKvsStatus }) => {
  state.remoteView = useRef(null);
  setStatus = setKvsStatus;

  useEffect(() => {
    startPlayer();
  }, []);

  return <>{state.playerIsStarted ? <VideoPlayers /> : null}</>;
});

function startPlayer() {
  state.playerIsStarted = true;

  startPlayerForViewer();
}
The function startPlayerForViewer() handles all the signaling workflow between the browser, AWS KVS, and the Rover.
async function startPlayerForViewer() {
  const kinesisVideoClient = new KinesisVideoClient({
    region: state.region,
    endpoint: state.endpoint || null,
    credentials: {
      accessKeyId: state.accessKey,
      secretAccessKey: state.secretAccessKey,
    },
  });

  const describeSignalingChannelCommand = new DescribeSignalingChannelCommand({
    ChannelName: state.channelName,
  });

  const describeSignalingChannelResponse: any = await kinesisVideoClient.send(
    describeSignalingChannelCommand
  );

  ...
Status monitor
To monitor and display the connection status in the UI, we have added here setStatus() that will set the global state into our StatusMonitor component.
state.signalingClient.on('iceCandidate', (candidate: any) => {
  setStatus('connected');
  state.peerConnection.addIceCandidate(candidate);
});

state.signalingClient.on('close', () => {
  setStatus('disconnected');
});

state.signalingClient.on('error', (error: any) => {
  setStatus('error');
});

state.peerConnection.addEventListener('icecandidate', ({ candidate }: any) => {
  if (candidate) {
    if (state.useTrickleICE) {
      state.signalingClient.sendIceCandidate(candidate);
    }
  } else {
    setStatus('waitingForHost');
    if (!state.useTrickleICE) {
      state.signalingClient.sendSdpOffer(state.peerConnection.localDescription);
    }
  }
});

...
Integration
After importing our KinesisWebRTC component, this how our Home.tsx would look like now together with the JoystickControllers and StatusMonitor.
import { IonContent, IonPage } from '@ionic/react';
import KinesisWebRTC from '../components/KinesisWebRTC';
import JoystickControllers from '../components/JoystickControllers';
import StatusMonitor from '../components/StatusMonitor';
import './Home.css';
import { useState } from 'react';

const Home: React.FC = () => {
  const [mqttStatus, setMqttStatus] = useState<string>('pending');
  const [kvsStatus, setKvsStatus] = useState<string>('pending');

  return (
    <IonPage>
      <IonContent class="main-content" fullscreen>
        <JoystickControllers setMqttStatus={setMqttStatus} />
        <StatusMonitor mqttStatus={mqttStatus} kvsStatus={kvsStatus} />
        <KinesisWebRTC setKvsStatus={setKvsStatus}></KinesisWebRTC>
      </IonContent>
    </IonPage>
  );
};

export default Home;
Testing the Ionic App
Once everything is in place, npm libraries are installed, KVS stream is running, then we can run:
$ ionic serveThis will run a web server instance (live reload) that you can test and develop with.

Summary
In this article, we have covered the video streaming part of the rover’s camera. We used the amazon-kinesis-video-streams-webrtc-sdk-c library on the Raspberry Pi side to stream the video to AWS Kinesis.
On the frontend side, we have added a new component called KinesisWebRTC that uses the @aws-sdk/client-kinesis-video, @aws-sdk/client-kinesis-video-signaling, and amazon-kinesis-video-streams-webrtc libraries to handle the WebRTC connection and video player rendering.
I hope you enjoy reading this, and stay tuned for the upcoming updates of this project. Thank you!